Tuesday, November 9, 2010

Chocolate Gooey Butter Cookies

Adapted from Paula's Home Cooking


These are not the best tasting cookies, but by far the simplest recipe I've seen. Weighing cost and benefit, this recipe is a good deal.


What you need
8 oz cream cheese
1 stick of butter
1 egg
1 tsp vanilla extract
1 tsp instant espresso/coffee powder
1 box Duncan Hines Moist Deluxe Dark Chocolate Fudge Cake mix
Powder sugar


0. Preheat oven to 350 degrees
1. Cream the butter and cheese with an electric mixer until smooth.


2. Beat in egg.

3. Add the vanilla, coffee, and cake mix. I added coffee to Paula's original recipe to bring out more of the chocolate flavor, but I'm using Sanka (decaf) because my toddler is going to be eating it.


4. Cover and chill in refrigerator for 2 hours. Shape into balls and roll in powder sugar. Bake 12 minutes and cool completely before serving.
The 2 hours are perfect for a toddler's nap! We used a mini-ice cream scoop to make the balls as uniform as possible, but no matter how we tried, the powder sugar process was quite messy...


Monday, July 19, 2010

Peanut Butter Cookies

Peanut Butter Cookies

What you need

1 1/4 c all-purpose flour
3/4 tsp baking soda
1/4 tsp salt
1/2 c unsalted butter @ room temperature
1/2 c creamy peanut butter
1/2 c sugar
1/2 c brown sugar
1 egg
1/2 tsp vanilla


0. Preheat oven to 375 F
1. Stir flour, baking soda, salt & set aside.


2. Beat butter for 30 seconds. Add peanut butter and both sugars, beat well. Add egg, vanilla and beat well.

3. Add dry ingredients on low and beat until mixed. Don't pour all the dry ingredients in at once - divide into 2-3 batches, pour & mix and then pour some more, etc. It'll save your arms some trouble.

4. Shape into 1 inch balls. If you like, you can roll these in granualted sugar and you'll get pretty sugar crystals on top of the cookies, but this sugar is additional to the 1/2 c in this recipe.


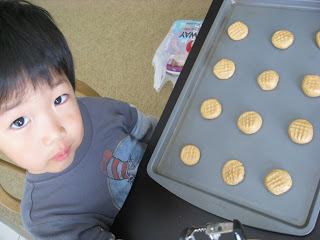
5. Place 2 inches apart on ungreased cookie sheet. Make criss-crosses with a fork. Don't push too hard or your cookies will spread thin. Use the tip of the fork to get the mark with minimum pressure.

6. Bake @ 375 for 10 minutes. Cool 1 minute before removing from pan and continue to cool on rack - if they last that long.


Crazy Good Brownies

Crazy Good Brownies
Adapted from Food & Wine July 2010


What you need
1 Lb unsalted butter
1.5 Lb chopped semisweet chocolate (equivalent to six 4oz bars)
1 c all-purpose flour
1 Tbsp baking powder
1 tsp salt
6 large eggs
2 1/2 c sugar
2 Tbsp pure vanilla extract
2 Tbsp strong brewed espresso
1 c semisweet chocolate chips
1 c chopped walnuts


1. Melt butter and chopped chocolate over low heat in a double boiler. This takes slightly longer than expected, maybe because I don't have a real double boiler and was improvising with a bowl over simmering hot water. Keep in mind that it's a LOT of butter and chocolate so it should be a LARGE bowl. If you're improvising like me, your bowl should NOT be touching the water but just perched above it. Give it a few stirs to speeden the process. Soft lumps are okay because you will be beating this later.

2. In a small bowl, whisk together the flour, baking powder, and salt. You can do this while the chocolate melts.

3. Preheat oven to 350 F and spray a 9 x 13 baking pan with cooking spray. You can do this while the chocolate melts, too. You'll have plenty of time.

4. In a large bowl, beat the eggs and sugar at medium-high speed until thick and pale approximately 4 minutes. Add vanilla and espresso, and then add the flour mixture until just incorporated. I was using a handheld mixer which was okay up to this point, but considering the next step, a stand mixer is highly recommended. Also be sure NOT to omit the espresso - it really makes a difference in bringing out a deep chocolate flavor - even if you have to use extra-strong instant coffee.

5. Beat in the melted chocolate mixture. The bowl at this point was super hot so I ladled the mixture. Whether you're pouring straight from the bowl or ladling, it's almost impossible to do this and mix with a handheld at the same time unless you have a trustworthy sous-chef, which probably doesn't apply to my 3-year-old. Of course, I guess if you have a real double boiler with a long heatproof handle, then it might be possible.

6. Mix in the chocolate chips and walnuts with a wooden spoon or silicone spatula. I used the spatula because you need it to scrape the batter in the next step- just one less thing to wash.


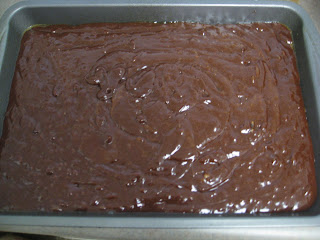
7. Scrape into the pan and bake for about 1 hour in a glass/ceramic pan, 50-55 minutes in a dark pan. Bake until tops are shiny and edges beginning to set (moving away from the pan). The center will still feel undone (don't rely on the toothpick test). Cool completely, cut, and enjoy. If you use the toothpick test, your brownies will be overdone (the sides will be burnt). If you don't cool completely, the brownie will fall apart. Cool completely - even after 3 hours, it was a little soft - but after letting it set overnight, it was really fudgy and dense.


I tried using baking mixes - the usual suspects (e.g., Betty Crocker) and even a Ghiradelli Double Chocolate (this one has chocolate chips in the mix) to compare. I mean, is this recipe worth the trouble  -double boiler, ladling chocolate, etc. etc.? The answer is absolutely YES. Although you can add espresso to the box mixes to get a deeper flavor, you can't match the fudginess of this recipe. Nor the size.

Friday, July 16, 2010

Sedona Tortilla Soup

Sedona Tortilla Soup
Adapted from the California Pizza Kitchen Cookbook


What you need
3 Tbsp olive oil
2 corn tortillas, cut into 1" squares
2 Tbsp minced garlic
2 Tbsp minced white onion
1 1/2 tsp minced japalapeno
2 cans of white corn (Shoepeg)
1 can diced tomatoes
1/3 c tomato paste
2 1/2 tsp ground cumin
1 Tbsp Kosher salt
1/4 tsp white pepper
1/2 tsp chili powder
1 1/2 c water
1 can chicken stock
1 can vegetable stock


1. Over medium heat, fry tortilla in olive oil until crisp.
2. Add garlic, onions, jalapeno and cook until onions are translucent.

3. Add 1 can of corn and everything else. Save 1 can of corn for later. I know, it doesn't look too appealing now, but it'll get there. Have faith. Bring to a low boil and boil for 5 minutes.

4. Remove from heat and process in batches in a blender or in the pot with a handheld propeller blade. Hopefully you have a handheld because now my blender top is stained a beautiful light orange. I learned my lesson and am buying one of those handhelds soon.

5. Return mixture to the pot and add remaining corn. Bring to boil while stirring constantly to avoid scorching the bottom of the pot.

6. Garnish with cheese or tortilla chips. Sorry, I had a few spoonfuls before I got around to taking the picture, but it's really really yummy and good alone or as a side to any panini. It keeps for at least a week in the fridge.

The original recipe calls for 1 quart of vegetable stock but I thought the chicken stock would give it more flavor. And I've increased some of the spices (e.g., garlic and pepper) because... well, that's how I like my food. Of course, the original recipe also calls for real corn and jalapenos, but when am I going to sit and shuck 1.5 Lbs of fresh corn? Canned corn worked fine, and I used 3 pieces of bottled jalapeno circles (which actually might be more than 1.5 tsp), but it all tasted fine and all of us, toddler included, loved it.

Friday, March 19, 2010

Avocado & Grapefruit Salad

Adapted from The Barefoot Contessa


The peppery arugula and buttery avocado go well together, with an added tang from the sweet and sour grapefruit. Chilled lobster would be a good addition - a lot like the the lobster salad I had at The Parkview (at The Shilla) - obviously minus the lobster and for a significantly higher price (30,000 won+, per serving). Our salad serves 4 at a cost of... I doubt it cost more than $10... and it's exceptionally good, even without the lobster.

What you need
- 2 ripe Haas avocados
- 2 ripe grapefruit
- 2~3 cups loosely packed baby arugula, washed
- 1 lemon
- 1 Tbsp Dijon mustard
- 1 tsp kosher salt
- 3/4 tsp fresh ground pepper
- 1/3 cup extra virgin olive oil

1. Prepare the dressing: Squeeze the juice of 1 lemon (catch the seeds). Combine with mustard, salt & pepper. Whisk in the olive oil.

2. Peel avocado and slice. Coat with half of the dressing to prevent avocado from browning.

3. Peel and cut grapefruit. Remove membranes and pith. Put in separate bowl. (You can keep 2 & 3 refrigerated until ready to serve.)

4. When ready to serve, spread the arugula on a serving plate. Circle the outside of the plate with the avocado. Add the grapefruit and the juice that collects at the bottom of the bowl (there will be a significant amount, so it's best if there is a little depth to your serving platter) to the center of the plate. Drizzle remaining dressing over the entire salad.

Thursday, March 18, 2010

Artichoke & Bacon Pasta

Adapted from Food & Wine, March 2010


What you need (to serve 4 adults, generously):
- 1/2 Lb Thick cut bacon (Irish cut, I used Smoked Applewood Bacon; the original recipe calls for pancetta which was not available at Whole Foods that day); diced
- 1 jar grilled artichoke hearts (Can use plain artichoke hearts, canned or in a jar; the original recipe calls for 8 small artichokes to be cooked and peeled)
- 1 Lb pasta (I used spaghetti)
- 1 small onion, diced
- 2 Tbsp ground garlic (3~4 cloves)
- 1/2 C grated Parmigiano Reggiano
- Salt, pepper, olive oil


1. Heat 1 Tb olive oil in sautee pan (you don't need to be generous here - the bacon will give off enough fat - just enough to protect the onions and garlic from sticking to the pan initially). When heated, add onions, garlic, and bacon and sautee over medium heat until onions are softened, about 10 minutes.

2. Add artichokes (don't need to add the excess oil), lower the heat to medium-low and continue to stir, about 10 minutes. Season lightly with salt and pepper (remember, the pasta will be salted as well!)

3. Meanwhile, boil a pot of water with 1 Tb of olive oil and a good sprinkling of kosher salt. When water comes to a boil, add pasta and cook as directed on the package. Reserve 2 ladles of pasta water.

4. In large bowl, combine pasta, reserved water, and artichoke/bacon mixture. Add 1/4 c grated cheese and serve the remaining 1/4 c on the side.

Wednesday, March 10, 2010

Cakepops - how to

Cakepops - original recipe from Bakerella, methods adapted slightly due to my refrigerator situation and current pantry supplies

What you need:
- Leftover cupcakes - in case you are not going to eat all 24 that come out of a cake mix box
- Leftover frosting. For 7 cupcakes, I used about 1/3 cup of buttercream frosting
- A large bowl
- A fork
- Lollipop sticks
- Chocolate candy melts/wafers
- Decorating supplies (like icing pens, sprinkles, chopped nuts, etc.)


1. Put a few leftover, cooled cupcakes into a large bowl. I started with 4 and actually wound up using 7 because I had some frosting (another ingredient) leftover.

2. Mash all the cupcakes into fine crumbs with a fork.

3. Add frosting and mix. I started with a fork and wound up using my hands in the end.

4. Mix well until the mixture is wet enough to form into balls without cracking/ falling apart (It should look like wet dirt). If it feels too dry, add another dollop of frosting and mix some more.

5. Form into balls. I used a mini ice cream scoop (maybe an inch in diameter) to scoop out the mixture and rolled it up with my hands. You don't need to place on wax paper unless you're not going to use the lollipop sticks.

6. Insert lollipop sticks and refrigerate for a couple of hours. You could put them in a freezer to save time - currently, my freezer has no space! I balanced them out using a plastic cup so they would stand without sticking to each other in the refrigerator. For the record, I got 17 cakepops from 7 cupcakes.

7. Melt chocolate wafers in the microwave - stirring every 30 seconds until melted thoroughly (I used about half a cup of wafers and zapped for 1.5 minutes in a pyrex measuring cup.) Dip the chilled cakes into the chocolate, let cool slightly (like 1 minute?) before adding the decorations (if you try to add the decorations too soon, it'll sink in and chocolate sprinkles will melt). Let cool - I suppose you could use the cup method again, but I have more space on my countertop so I stuck the lollipop sticks into a styrofoam block.

8. Devour!